Tuesday, February 23, 2016

Let's Go to Disneyland! - A Virtual Spring Break Vacation!


As my first grade students left for their holiday break, I told one of the children to have a wonderful vacation. He sadly looked at me and said, "I'm not going on vacation. I am just staying home." I explained to him that by vacation I meant not coming to school. His reaction made me think about how many students never get to travel and experience the joy of visiting popular vacation destinations. It seemed, however, that a solution to that problem was sitting in my classroom waiting to be unwrapped!
I had an Xbox 360 Kinect system in my classroom. We were using Kinect games for learning and I had recently been given a copy of Kinect Disneyland Adventure. I took it home for my grandchildren to play while visiting for Christmas, and it turned out to be an authentic trip to the Magic Kingdom. Players enter Main Street USA, collect autographs from Disney characters in an autograph book, and use a map to select the lands to visit in the park. Pirates of the Caribbean, It's A Small World, and all of the other favorite rides from the actual park are part of the game. It is as close as you can come to an actual visit without traveling there.
b2ap3_thumbnail_51Bjn-N7PkL.jpg
Using the game as a basis, I planned a unit for my students to "go on vacation" while learning and using a variety of standards based language arts, math, and geography skills! Working collaboratively in small groups, representing families, the students used the internet to research and develop a plan for taking a trip to Disneyland. In an authentic planning experience, the students learned to read informational text, evaluate information, and make informed decisions. They learned map skills, using online travel maps and maps of the park. Math and personal financial literacy skills grew as the kids learned to use calculators, to work with large numbers, and realized that vacations require long term goal setting and saving. There were plenty of opportunities to practice writing skills as well, as they created travel brochures, journals, and postcards for the trip. 
Here is a video of students telling about the project:
Here is an outline of the unit if you would like to take your class to Disneyland, just in time for Spring Break! (I created this learning activity for first and second grade students, but it can easily be adjusted for older kids as well.)
Pose questions: How can we get the things we want but don't necessarily need? Why is it important to have goals? How do you make a plan? What is research? How can a group work together to achieve a goal?
If they have not already done so, introduce students to working in the clouds. Demonstrate how to use a Microsoft Onedrive document or a Google Drive document to perform tasks and record their work. As teams record their work on an online document, the teacher can easily monitor the progress and work of each team.
Hold a discussion about what it means to work as a team. Set expectations for teamwork for the project. Assign students to teams of about four.
Note: Key technology skills are introduced as needed by the various learning activities and performance tasks. For example, how to open a link, use tabs on a browser, and use tools like calendars and calculators.
Review prior learning about geographic tools such as maps and globes, then introduce students to online maps (Bing or Google maps) and demonstrate how to locate places and change views. Then have student teams practice by locating Disneyland, zooming in and out on the map, and using a variety of views to explore the park on the map, locating the castle and noting other interesting things they find.
Hold a class discussion about what things need to be planned for a vacation to Disneyland. Generate a list of things to do and decisions to make.
Create online documents for each team (using Onedrive or Google Drive), adding tasks that represent the steps resulting from the brainstorming session
Tasks and pages may include which park to visit, transportation options and costs, time of year considerations, lodging options and costs, food expenses, admissions, what to pack, how long to stay, and what to do while they are there.
Initiate a conversation about good times for vacations. Each team will decide when they would like to go to Disneyland and how long to stay, entering their plan in their online document.
Review the concept of transportation and ask students to brainstorm and list as many ways as they can think of to travel to Disneyland. Hold a class discussion about the considerations for each form of transportation.
Assign homework to find out how much fuel costs for cars and how many miles they can drive on a gallon of gasoline.
Introduce the concept of research as a way to decide which form of transportation to use. Begin with the car. Explain how the costs of driving are calculated using gas prices and miles per gallon. Using information gathered in homework, demonstrate how to use a calculator to determine a cost for fuel.
Demonstrate how to use online maps to determine mileage. Student teams will practice determining the mileage from the school to Disneyland. They will then use the agreed upon gasoline cost and mpg to calculate how much it will cost to drive.
Demonstrate how to use an online airline reservation site to calculate the cost of flying. Student teams will work together to enter the necessary information, based on the travel dates agreed upon in each team, to find flight costs for their family of four.
Through the process of planning a flight, the variable of dates and lengths of stay will become important. Students will need to rethink and revise their earlier plan for when to travel several times as they calculate costs of flights.
Explain that there are many places to stay near Disneyland and that they can vary in cost considerably. To keep the task age appropriate and manageable by the students, narrow the choices to the three hotels within the Disneyland Resort. Demonstrate how to search for rooms, rates, and the features of each hotel. Students will works as a team to investigate and select their hotel. They will calculate the cost. Once again, it may be necessary to rethink and revise dates and lengths of stay as the teams compare costs of lodging.
This is a good point to reflect on all the research to this point and discuss the need to make some final decisions. Lead the class in a discussion about what factors need to be considered before finalizing plans. Allow time for each group to compare and contrast car vs. airline, various hotel options, length of stay, time of travel, and overall cost of trip.
Teams that are firm in their plans can do extra explorations about weather, special events, and other locations for Disneyland Parks in the world. Teams that need assistance can receive extra direction from the teacher.
Final planning will include what to pack in suitcases.
Once the teams have completed their planning, they will need to consider how such a "dream" trip will be financed. Hold class discussions about how a family could pay for a vacation and setting a short or long-term goal for saving money. Work as a group to decide how much is a reasonable amount to save each month and use calculators to figure out how long it might take to save enough for the trip.
The last group decision will be to investigate the major rides at Disneyland. Each team will have 30-60 minutes to play in the virtual Disneyland Park on Xbox 360 Kinect. They will need to have a plan for how to spend that time and how to share the games.
Review or introduce rounding of numbers and reasonable estimation. Student teams will review their plans to round and determine reasonable estimations for all dollar amounts.
Each team will work together to prepare a written plan covering all aspects of their vacation, including how to pay for it. The plan will be submitted online to the teacher.
Each team member will also write a reflection about what he or she learned, how they can use this process for making other plans and setting goals.
Involve the class in planning a field trip to the local airport (if possible) to learn more about air travel. Use the steps in this unit to pose questions to research and plan the field trip with an understanding of costs and logistics required for taking such a trip. Take the trip.
Bring the unit to a close with time for each team to visit the virtual world of Disneyland using the Kinect game. Through the game they will experience and use the same maps that they used in their investigations and put into use their plan for cooperation and how to spend the valuable and enjoyable time. 
As an extension of the learning, students who are not playing the game will be creating travel brochures, imaginative journals about their travel, and postcards to send to friends and family. We took daily morning walks through the Disney park on the Kinect system to provide the kids with visuals and ideas for their journals.
Finally, students will demonstrate their understanding of planning and goal setting by writing their own personal goals and plans.
Although you can do this same activity without a video game, the addition of the Kinect game made a difference for the students! It was an amazing reward for all of their hard work and provided an imaginative playful adventure inside a park that many of them may never see! They were engaged and inspired! We summed up the class learning at the end of the project... the difference between a dream and a goal is a plan...

Wednesday, January 27, 2016

Giving Back to the Community - A History Project for Children


What better way to learn the tools of historians than to take a trip to a local museum to see them firsthand! As my second graders learned about artifacts, documents, photographs, and oral histories from the museum director, Dan Davidson, they quickly realized they had a tool to share as well! Having experimented with the use of QR codes and using iPads for creating videos, they saw a way to add a new dimension to the exhibits at our local museum.

They introduced the idea of capturing oral histories on video, uploading the videos to YouTube, then creating QR codes to be displayed in exhibits. The museum director of our local museum, Museum of Northwest Colorado, was unfamiliar with QR code technology at that time. As the kids explained how it worked, he was extremely supportive of the idea and provided a list of contacts. The class wanted to focus on local elders who had connections to exhibits they saw in the museum.
We began with a series of lessons about the history of our small community and comparisons of photos from the past and today. Using a list of names provided by the museum, we began contacting local elders to invite them to participate in our project. Once contacts were made, and visits scheduled, the class began a series of trips back to the museum to film. Using the exhibit as a backdrop, the students interviewed and filmed each elder telling his or her story. 


After a bit of editing, the videos were uploaded to a museum YouTube channel, QR codes were created and delivered to the museum for display. The project was not only important to the students, it was equally as engaging for the elders we interviewed. More than one asked for an additional opportunity to talk with the kids. One favorite, Myrtle, a delightful friend in her 90's, said she had forgotten to share some of her stories.She visited our classroom to share more, bringing along quilts, photographs, and toys from her past. 

Our project did not end there. With the help of the local newspaper, we organized an event at the museum to introduce the project. We invited those who participated in the oral histories, student family members, and local community members to the museum to see the new QR code displays. People were encouraged to bring along devices. Second graders were on hand to help download apps and teach people how to use QR code readers to see the videos. 

Learning about history was made even more fun and memorable by participating in the gathering of oral histories. The children were excited to be part of introducing a new technology to the displays and they made wonderful new friends. One of the elders scheduled for interview passed away prior to our visit. The children were deeply saddened and realized how very important it is to gather the stories of our elders. We have since lost some of those we were able to capture, but because of the work completed by the children, their wonderful stories will live on at the museum. You can view the videos captured for this project by clicking on this link: http://www.museumnwco.org/video_glimpse_to_the_past 


Thursday, January 14, 2016

Friend Magazine: A Valentines Day Treat!


With only a month left before Valentines Day, it is not too early to start planning for a treat filled with literacy skills and, most importantly, fun! Everyone has heard of People magazine, so your students will be thrilled when they hear they are going to create Friend magazine!

There are many ways to connect this activity to standards. Biography, interviewing, listening and speaking, narrative writing, poetry, or whatever literacy skills you may be working on can be incorporated!

The basic steps are:
  • Teach background in interviews and biography.
  • Brainstorm a list of questions that would be interesting to ask a friend. The questions can be as simple as, "What is your favorite sandwich?" to more involved questions like, "What is your favorite memory?" 
  • Create a question list with room for answers or, with older students, have each child create their own personalized list.
  • Partner students. (There are many ways to accomplish this. Draw names, self-selection, teacher assignment, etc. I have actually used this activity with pen pals in a school across town. We visited their school to conduct the interviews and they visited us to enjoy the final product! The same would work with another class in your building, either the same grade level, or perhaps, an older buddy class!)
  • Paired students conduct interviews of one another. The interviewer is responsible for writing down the answers. (This activity, of course, can easily become a digital project as well, but I always used it for a writing assignment. A child who has difficulty writing answers quickly may, however, benefit from recording their partner's answers.)
  • Once all of the information has been gathered, each child becomes responsible for writing an article about his or her friend. 
  • The articles can be written on paper or on a computer. One simple way to organize the project, if you have enough available technology, is to use Google Drive or One Drive. (My students created their articles online then shared the finished work with me. I was then able to compile a complete set of articles.)
  • As the articles are written, revised, and edited, be sure to reinforce the literacy skills you are teaching. This is a wonderful opportunity to stress details and word choice. Remind them that the audience will be classmates and families.
  • Each article should have a photo of the child as well. (My students took pictures of one another with iPads, but again, there are many ways to accomplish this part. With the iPad pictures, students were able to use the Educreations app to add descriptive words and character traits to the picture of their friend.)
  • Once all the articles are complete, print them, with photos, and create a magazine for each child. The cover may say Friend Magazine with a group photo if you like! (Although it is important to conserve paper and be careful with photocopy numbers, this is one project I felt was worth the expense.)
  • The magazine now becomes a reading assignment for Valentines Day. The children love reading about each other and having the magazine as a class keepsake to take home. It can even become an autograph book!

Planning ahead can result in authentic writing and reading to be enjoyed by all and cherished for many years to come! Standards met, lessons learned, and friendships formed! Friendship, after all, is a matter of the heart!


Monday, January 4, 2016

Where in the world do I live? - Sorting it out through actions!


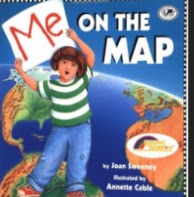
I will never forget the first time I asked first graders where Earth is. While some looked a bit puzzled by my question, others confidently pointed up. Up? Why of course, it is in outer space! Young children are expected to master map skills and to know where they live. If you have ever tried to teach little kids the names and layers of places in which they live, you will understand how very difficult that can be for both student and teacher! I have used songs, books, and the recent Me on the Map crafts and activities that are abundant on Pinterest! In spite of the fact that my students could create the visuals and sing the songs, most remained confused by the difference between city, county, state, country, and continent. At least by the end of the lessons they all pointed to the ground when asked where Earth is!

Now, I have an idea that I think may be just the answer to this difficult learning task for young children! The best part is the map skills can be incorporated into actions that will teach lessons far beyond the simple social studies standards of mapping. We spend so much time in school learning academic skills, that we often forget the importance of building social character skills in our children. Those skills are equally important or, perhaps, even more important in the education of the whole child. Our world is in great need of people who have developed empathy, responsibility, and a sense of caring. Would you rather guide your students to become excellent test-takers or excellent thinkers, problem solvers, and people? In teaching small children where they belong in the world, you can teach them that they and their actions can make a difference...

Begin with a song! Singer-songwriter, and my friend, John Farrell, has written a song that is perfect for this task. It's the Little Things puts into words and music the idea that when we work together, we can make this world a little better. Take the time to teach the song to your students. You can even add hand signs to make it more interesting! 

Once your children know the song, introduce the concepts of space and community. To which communities do they belong? Family, neighborhood, class, school, town, state, country, and world are all communities which include your students. As they think of little things they can do to make the world a little better in their home, school, or town, they also will develop a sense of the place.

As the song says, it's the little things that make a difference. While the ideas need to come from the children, they can include simple ideas like making special cards for the lunch servers, leaving a treat for the custodian, taking the trash out at home without being asked, asking a new friend to play at recess, sharing toys, or writing a letter to Grandma.

Our school developed a special friendship with the residents of a nearby senior housing center.
Classes visited to read or share holiday activities. They made May baskets and Christmas surprises to leave on the doorknobs of the residents. Other classes make sack lunches for our local soup kitchen for the diners to take home for an extra meal. The possibilities are endless! Just ask the kids! They will undoubtedly have more ideas than you can imagine.

One year we had an early snowstorm that broke many branches in our school arboretum. The damage was extensive. The first graders banded together to clean up the area, stacking all of the broken branches and debris in one corner by the gate for the building and grounds people to remove. The sense of ownership and pride was intense as the young students saw what they could accomplish together!

As the students successfully complete acts of kindness at home and at school, challenge them to think of things that might help in the larger community, country, or even the world. My students took on a local deer problem, creating a brochure to help people deal with the growing herd in our town. They took on a global problem as they created a video to ask for help in saving orangutans in Borneo by not purchasing products with palm oil. One of their favorites was learning good sportsmanship by offering a challenge to friends in Seattle during a Seahawks-Broncos Super Bowl. We lost, but the kids followed through with smiles as they wished their friends in the Northwest congratulations for the Seahawks win!

As you plan for the coming weeks, remember the hats your students wear... Can they make the world better as a neighbor, a friend, a family member, a class member, a school member, a citizen of the community, a citizen of the country, a citizen of the world? Even the youngest people can make a difference! As they take action, they will sort out their place in the world, and ultimately, make the world a little better!


Tuesday, December 29, 2015

Let it Snow! - A flurry of learning...


With the recent emphasis on standards, skills, and test scores in school, there has never been a more important time to be mindful of the need for imagination, creativity, and play in the lives of young students. There have been countless articles written and research projects undertaken to reinforce the need for creativity and play in the lives and education of children. Perhaps one of the most well known is the Ted talk by Sir Ken Robinson. Although the talk was presented in 2006, the problem persists, and perhaps, is even greater today. in many schools, than it was then! 

Even if you are teaching in a standards or skills-based learning environment, most standards and skills-based learning can take place within creative activities. The learning will undoubtedly be more meaningful, connected, and will be more likely to result in mastery, when presented in a playful way. Here is one example I have used with both first and second graders, but can easily be adapted for any elementary grade level!

What child does not like to build a snowman? Regardless of where you live, you can make a
snowman out of paper mache! Set aside one day for the messy part of this project. Cover a long table and the floor beneath with painter's plastic drop clothes. Arrange for parent volunteers and paint shirts for the kids. Send home a note in advance, asking the kids to wear old clothing. Gather balloons, newspaper (our local newspaper office has lots of old papers that they will donate) torn or cut in strips, bags of flour, large bowls or dishpans for the paper mache goop, and small plastic bowls or margarine tubs to hold the completed snowmen while they dry. I always inflated the balloons the night before, taping two together with masking tape, and storing them in large trash bags for easy access. On the day of creation, I asked parent volunteers to be on hand throughout the day until all the children had finished. Working with six to eight kids at a time, they assisted those making snowmen, while I worked with the rest of the class in other learning activities. You will need a place to store the wet snowmen while they dry. A windowsill, shelf, or other location will work. Be sure to cover that area with plastic as well and have plenty of small plastic bowls or containers on which to stand the snowmen. They take several days to
dry completely, so plan ahead. As the tops dry, remove them from the bowls to allow the bottoms to dry as well. Once they are completely dry, a pin will pop the balloons and pushing down gently from the top will form a flat bottom allowing the snowmen to stand on their own.

Decorating the snowmen requires a variety of supplies like construction paper, crepe paper, buttons, pompoms, wiggly eyes, etc. Craft glue works better than school glue to hold things in place. An afternoon of creativity will result in a classroom full of delightful characters sure to bring smiles and enthusiasm!  The learning, however, has just begun! The snowmen are the center of an abundance of learning opportunities. I will share a few I have used, then use your own creative thinking to find connections to the standards in your grade level!

Math Applications:
  • Geometric shapes (cylinder, cone, sphere)
  • measurement (height, weight, circumference)
  • child created story problems acted out with the snowmen. (Have each child write a story problem to be reproduced into a booklet or worksheet of problems for the class to solve.)
Science Applications:
  • Solid, liquid, and gas (balloons, paper mache goop, flour and water, evaporation)
  • weather
Literacy Applications:
  • Read a variety of snowman stories. 
  • Write how-to build a snowman (either with snow or paper mache).
  • Write creative snowman stories emphasizing fiction story elements like characters, setting, problem, events, solution, beginning, middle, and end. (I always used the stories as an opportunity for the kids to make an actual book, complete with cardboard and cloth covers, and illustrations. The books were then on hand for the other children in the class to read during reading time. They were sent home with the snowmen when the project was completed.)
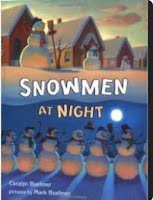
  • Create a class version of the well known Snowmen At Night, by Caralyn Buehner.
    Collaboration, rhythm and rhyme, theme, imagination, and multimedia skills are all required for a successful project. Once the class decides on a theme, small groups are tasked with thinking of a location to photograph the snowmen and the rhyming words to accompany the picture. I used a paraprofessional in my class to take the groups, along with an ipad or other camera, to stage their photograph. The completed story was then reproduced for each child and became a book to read in class and at home. We also created a video of the story to post to our Youtube Channel. Examples of class themes have been Snowmen at School at Night and  Snowmen on the Playground. 


Here is an example of one of our multimedia videos:

The possibilities for learning are endless with a project like this. A few days of messy, busy creativity will allow your young students to learn with their imaginations and playful spirits. Plan your learning targets ahead of time, then watch as engagement and mastery abound! 

Sunday, December 13, 2015

The Season of Hope and Light...

It has been a week of granted wishes and dreams! After partnering with a teacher in Australia for nearly 20 years, our wish to meet in person has come true! She and her delightful family are traveling in the United States for their summer holiday. They left behind hot summer weather to spend a week with us in snowy Colorado! Laughter and joy abound as we compare our ways of life on opposite sides of the planet, and celebrate our much greater commonality as we are all citizens of the world regardless of the country in which we live.

Holidays are a wonderful time to reflect on the many blessings in our world and to celebrate diversity. As the last week of school before a break is upon most of us, it would be my wish that you remind your students that children everywhere celebrate peace and hope. My dear friends, John and Ann Marie Farrell, created a beautiful song and presentation to teach about holidays around the world in this season of hope and light.


May all of you and your students find the joy in life and light in the world and may all of your wishes come true!

Sunday, December 6, 2015

A Simple Family Gift...

With two weeks remaining before the holiday break, many teachers are planning gifts for their students to make for their families. One of my favorite student created gifts was an old-fashioned board game. I created a simple blank game board, reproduced it on the copy machine on legal sized paper, and the kids did the rest. Although, I don't have a copy of the one I created, a simple search for "blank board game templates" turned up a variety of reproducible boards that you can easily print. One of my favorites was:

http://www.timvandevall.com/templates/blank-board-game-template/ 
(The board above came from that site and can be downloaded as a PDF file. It is very similar to the one I created.)

Whether you use one you download, create your own, or have your students make the board, the fun is just beginning! Brainstorm board game words with your class. I always found that many children play video games, but there are some that rarely or never play good old-fashioned board games! The brainstorm session helps all the kids make a more interesting game. Make a list of game moves like:

  • lose a turn
  • go back to start
  • move two spaces ahead
  • roll again
Next, talk about game themes. Will you make your game a Christmas or Hanukkah theme or, perhaps, your favorite topic! Brainstorm possible themes like:
  • around the world
  • a trip through the forest
  • deep in the sea
Of, course, the age of your students will determine how complex the game becomes. The creative possibilities are endless as each child designs a game they think their family will enjoy.

Writing in the boxes and decorating the board are the next steps. Be sure to remind them not to color over the words. 

When the board is complete, you can laminate it if you are able. I always purchased cardboard gift boxes after Christmas when they were on sale, but if you have not planned ahead, you can look for the least expensive ones to purchase now.  Choose a size in which the game board will fit. The children glue their game boards inside the bottom of the box. Add objects for game pieces. I used plastic milk jug lids, beans, coins, or any small objects that can be colored different colors or marked in some way. Add two dice to each box as well. (You can often find them in bulk at the dollar store, or purchase small foam cubes from a craft store and have the kids create dice. )

Once the games are complete, the kids partner up with classmates to play the games they created. 

Wrapping is quite simple! Simply put the lid on the box, add a bow and a gift tag and send them home! 

The joy of this gift is the opportunity for the child to present a gift that brings the family together for a game. Dice games are a perfect way for children to practice their math facts as well! Creativity, writing, strategy, and math in a simple family gift!


Sunday, November 29, 2015

The 12 Days of Christmas Revisited...

Classroom days between Thanksgiving and winter break are few for most classrooms. Add to that the excitement of approaching holidays and young students need more than ever to be captivated by lessons to stay on track! One fun language arts activity my students always enjoyed was writing new words to Christmas songs! Second graders who had been learning about local wildlife and our community in the prior months, eagerly transformed the 12 Days of Christmas into lyrics that fit where we live! Suddenly a review of science and social studies lessons becomes the basis for a collaborative writing assignment that engages all the children! Brainstorming, rhythm, syllables, patterns, research, decision-making, and cooperation all come into play as the kids negotiate the final version.


We began with the traditional version both in song and book form. One of my favorites is by Jan Brett:


The significance of the 12 days was revealed in our holidays around the world lessons as we learned that Epiphany, or Three Kings Day, is celebrated in many cultures.


The history of the song is interesting for kids and the lyrics contain gifts that may be unknown to young children. Wikipedia has a page with links to a picture of each gift:
https://en.wikipedia.org/wiki/The_Twelve_Days_of_Christmas_(song)

We always had pen pals in Australia, so we learned the Australian 12 Days of Christmas. The unusual animals and southern hemisphere celebration add opportunities for a wonderful discussion of Christmas in a new setting.
Provide written lyrics for the students to sing along (the lyrics are shown in the Youtube video). Allow time for researching the animals in the song or show pictures of each. After a bit of compare and contrast from the original to the Australian version, you have the perfect lead in to the writing of your own local version!

Once the lyrics have been determined, it is easy to find karaoke music on Youtube. Here are three of many versions:
https://www.youtube.com/watch?v=A8FdRvu_6MM
https://www.youtube.com/watch?v=XVLxB-cMr94
https://www.youtube.com/watch?v=Fkvfo-BwGuE
Listen to the versions to find one that has the appropriate tempo for your students.


A bit of history, local knowledge, and music become a song written by your students! Print the lyrics and you have a reading lesson to practice for fluency! Here are two versions performed by my class in rural northwestern Colorado:

Sunday, November 22, 2015

A letter to Santa...

December brings holidays and opportunities for letter writing! For children who celebrate Christmas, writing to Santa is a holiday tradition, so what could be more motivating for learning or practicing commas, capital letters, periods and question marks, as well as correct letter format, than a letter to Santa Claus? Over my years of teaching, I located a few resources that added to the motivation by resulting in responses to the letters!

One of my favorites is located here in Colorado. The North Pole in Manitou Springs, Colorado is a fun visit any time of the year, but you don't have to visit in person to get a response from Santa. Have your students write a letter to Santa (using any language arts skills, standards, or requirements that fit your curriculum). Make sure each child has written his or her first name clearly on the letter. I always made copies of the letters to send home as well. Put them all in an envelope and send it to:

Santa's Workshop
5050 Pikes Peak Hwy
Cascade, CO 80809

If your letters are received by December 10, your class will receive an envelope of personally addressed post cards from the North Pole in return! (Letters received after that date will not be answered.)

Another wonderful site that provides an instant response, but does not allow for letter writing skills, is http://emailsanta.com/email_santa.asp.  Children enter information in boxes on a form letter (they can skip the email address, which is not required), check boxes, and choose responses from drop down menus. There is a place at the end for them to type a personal message as well. I always made a copy of the form so they could be prepared with correct spelling, capitalization, and a list of gifts for which they were asking before they entered their information online. (The response from Santa uses their exact spelling and capitalization, of course). Choose the second option for sending the letter (it suggests that option for classrooms of students sending letters). Your children will watch as a picture of Santa appears along with immediate messages telling them that Santa is reading their letter, writing back to them, and to click the candy cane to see his letter! In a matter of moments, a personalized letter from Santa appears, including responses to the specific details in the child's letter. Before closing the window, be sure and print out both their letter to Santa and his response to them.

One of my personal favorite sites does not provide free letters back from Santa, but provides a glimpse into, perhaps, the actual North Pole in the Arctic Circle where Santa lives! Located in Rovaniemi, Finland, Santa Claus Village is a place I would love to visit! The website has links to marvelous videos I have used in my classroom. My second graders had been reading books by Jan Brett, including The Wild Christmas Reindeer, when questions arose about where Santa actually lives and how reindeer fly. As we researched, we came kept coming up with the same answer: Rovaniemi, Finland. We were lucky to have pen pals in Finland, so the kids were familiar with Scandinavia, and knew it was located in the far north. The illustrations in the book, as well as The Christmas Trolls and Who's That Knocking on Christmas Eve?, also by Jan Brett, were definitely Scandinavian in design, further supporting the research.


The delightful videos included information about reindeer and glimpses into life in Santa's Village. Although you will not receive letters back, your students can send their letters to Finland at this address: 

Santa Claus Main Post Office
96930 Arctic Circle
Finland

What could be more authentic than that? And, regardless of where you send the letters, videos like this will inspire and motivate your young students to do their best writing, perhaps of the year!


Sunday, November 8, 2015

Making Global Friends

If you have not connected your students to friends somewhere else on the planet, they are missing out on an amazing opportunity to build global awareness, understanding, and meaningful projects. Over my years in the classroom, my students had a variety of experiences with global friends. From actual letters sent through the mail, to travel buddies and Flat Stanley projects, to Skype and shared online projects, the experiences were all valuable and engaging for children!
We, in my last years of teaching, had long term friendships established with teachers in Colombia, Finland, South Africa, Lebanon, and Australia. Over the years we also had connections and projects with children in India, Saudi Arabia, England, Zambia, Sweden, Taiwan, Mexico, Canada, Iceland, Turkey, Scotland, Brazil, and undoubtedly others I am forgetting. One year we had friends in Iceland while a volcano was erupting and, at the same time, in Australia where wildfires were burning out of control. My students were watching the events on the news at night, and communicating with students in each location at school. Each experience added to the knowledge of children on both sides of the exchange, as they learned how much alike they all were in spite of their geographical differences.

There are many ways to build international connections for your students. My favorites were ePals and the Microsoft Educators Network (Now call Microsoft in Education). My original connections were made within ePals. As a result of one such connection, I became part of the Microsoft Innovative Educators where I met others in person at global conferences. The new Microsoft in Education site has Skype in the Classroom which I have also used to connect with students in other places. One of my teaching partners found great success with using grade level hashtags (i.e. #kindergarten or #1st grade) to find pen pals on Twitter. Her kindergarten students communicate with students across the globe. Here is a list of links (some I have used, others I have not) to explore for finding a partner class or global project to join:

One of the most important things to remember is that finding a great international partner for your classroom requires persistence. Some requests for partners go unanswered. Others result in a one time communication that does not continue. But, if you are patient and don't give up, you will eventually find another teacher who is willing to establish a long-term friendship and connection from his or her classroom to yours. Below are links to two posts from another blog of mine. The story begins in the very first post made to the blog in 2009. I have chosen these to share because they tell a bit of the story about what can happen when you reach out to teachers in far away places:

http://carnett-sortingitallout.blogspot.com/2010/08/unbelieveable-i-just-reread-my-posts.html#links
(The two international teachers mentioned in that blog are still my friends. The photo above is of Rawya and I at the Cape of Good Hope. The teacher from Australia and her family will be visiting me in my home in Colorado in a few short weeks.)

Finally, finding the right project or style of communication is important. That will be the subject of several future blogs as I share the many incredible experiences my students had with friends around the world. For now, reach out to a few classrooms and try to make a connection. Or, perhaps your class wants to start a project and is looking for partners to join them. There are many places to try, but concentrate on one and be persistent. You never know where you and your students may find that special new friendship that can last a lifetime!

(This one is for you, my dear friend, Rawya!)


Sunday, November 1, 2015

History, Geography, and Environmental Studies


On a recent trip to northern New Mexico, I found myself in a thought provoking situation. We spent the first part of a day visiting Bandelier National Monument, hiking the canyons and cliffs that were home to the Ancestral Pueblo people. The beauty of the natural surroundings were breathtaking and imagining life in that setting without modern civilization was inspiring. That afternoon we traveled to nearby Los Alamos, New Mexico, which was the site of the Manhattan Project and the creation of the atomic bombs that were used to bomb Hiroshima and Nagasaki during World War II. Visiting museums and learning about that terrible time in human history was a stark contrast to the morning visit to Bandelier. The reflection that resulted remains in my mind even today. 

One specific understanding I have reached is that many people today do not feel the same need to honor and respect the land as did the native people. An obvious reason is that we no longer depend on our immediate environment to support our lives. Goods and materials from around the globe are easily obtainable for shelter and clothing. Our food source is the local supermarket. We can easily take our world for granted. 

The lesson idea this week is closely linked to that experience. The study of Native People is a topic that captures the interests of most students. Interwoven in their story are invaluable lessons about geography, habitats, natural resources, and environment. While this is not a new idea and is part of many curriculums, there are a vast number of resources available. I will share those I used.

Although the lesson I created was for second graders in the United States, most of the ideas can be modified or adapted for older students or those in another country as well. The lessons for my students followed a study of our local habitats as they pertain to wildlife as well as social studies lessons about basic needs. Making the connection to the effect of habitat on people is quite easy to do when teaching about history and the lives of our ancient native people. We always began with mapping and a geography lesson about our country. In addition to small individual maps, one of the key elements to the unit was a large class created relief map:

Our map was made with a mixture of 1 cup of any brand powdered laundry detergent (the least expensive and scent-free) to 1/2 cup liquid starch. Add powdered tempera paint or food coloring for the color. I covered a table with plastic, then taped a large piece of butcher paper with the map outline over the plastic. The students worked together to color in bodies of water, and the connecting countries of Mexico and Canada. We looked at relief maps online, traced in mountain ranges and the desert region. Students used wadded up paper towels and masking tape to build up mountain ranges. After mixing the detergent, liquid starch, and coloring in a large bowl, each child took a turn covering the land with the thick mixture. Leaving the desert uncovered to be filled in with glue and sprinkled with sand. To illustrate forested regions, the kids cut double-sided green triangles and glued them over straight pins to be stuck into the woodland and mountain regions of our map. The map became the focus of our learning and included a compass rose and map key.

We used four geographic locations and the Native Americans who lived there to learn about the variety of land and habitats in our large country. The Woodlands, Great Plains, Desert Southwest, and the Northwest Coastal regions were our targets. We learned how the people of each region met their basic needs with the resources found in their environment. For each region we watched videos, read nonfiction articles as well as Native American legends, stories, and poems, created a craft, tasted a food, and wrote a report. The reports, poems, pictures, and maps were gathered into a student made book to be taken home at the conclusion of the unit.

One of the most beneficial parts of the learning was the use of video I originally obtained from United Streaming. Re-enactment videos are rich resources for young children. The ability to visualize helps them comprehend written accounts and details. I have since located the videos I used on Youtube. They are available at no cost. Each video can be divided up into shorter sections for discussion. I did not include the portions at the end telling about the arrival of the Europeans and the conflicts that resulted. For the purpose of these lessons we were focused on the land and how it was used to meet the needs of the native peoples. We did talk about the end of the Native American way of life at the end of our study, but not as we learned about each region. Preview the videos to decide which parts are relevant for your lesson targets. Here are the links:

Our crafts were related to learning from the videos and reading. There are many possible choices. We created birch bark baskets for the Woodlands, teepees for the Plains, kachina dolls for the Desert, and totem poles for the Northwest Coastal region. The links to crafts here are only examples. Check Pinterest for other ideas.

The National Museum of the American Indian has a wonderful website with ready made projects for middle school students. It highlights the current day stories of Native Americans in four regions as they tell about environmental problems affecting their land. 

The National Park Service also has a variety of related resources for all ages that connect to this lesson. Ready made lessons and informative passages can be found at the site. One example for older students is a lesson titled Who Uses the Land? For younger students a great resource is Deciphering Pictograph Messages.  Although we are not able to visit the National Parks, we can benefit from their educational resources.

I have also used expert sessions through Skype in the Classroom to take virtual field trips with my class. The Buffalo Bill Center of the West in Cody Wyoming has a beautiful Skype session about the Plains Indians. 

More Than Moccasins is a valuable resource for teaching young children as well. 


Finally, take time to extend the lesson into a project-based experience. There were native people all over our land. Which ones lived in your region? How can your students show honor and respect for those who first lived in your location? How can they help preserve the history and preserve the land where you live?

Through these lessons focused on history, geography, and the environment, children will hopefully gain a greater appreciation of the land around them.