Sunday, August 30, 2015

"I want a turn!" - Assessment can be fun and engaging!


Assessment has always been part of teaching and learning, but it now plays, perhaps, the biggest role ever. Evidence of learning does not have to always be pencil and paper, however. Some of the best measures of achievement are found in the informal observation of students. In a classroom of 20 or more children, though, it is difficult to observe every child at just the right moment. Fortunately, we also live in a time where technology is available to capture the evidence for us!

A quick word about technology. There are many different tools that can be used to achieve the results I will describe. New tools are constantly evolving as well. The actual video clips I will show you were created several years ago with a Flip Video camera (I don't believe you can even buy one today!), but I have since used iPads for the same results. As teachers, we are limited by the technology decisions made in our districts and the personal technology we can provide from home, but great ideas can be achieved regardless of the platform in which you work. For this assessment, you simply need a way for students to video one another. Perhaps you still have a small hand-held video camera, Surface tablets or iPads, a digital camera that records video, or even a smartphone! Any device will work! And remember, you don't have to be a master of the technology! The kids do, and probably already are!

Math assessments are often pencil and paper. The word "test" strikes fear in the hearts of some children. I found that I could assess even more effectively if I gave my kids a chance to demonstrate their understanding without realizing they were taking a test. As my second graders completed work, I paired them up, handed them a video device, and asked them to make a "how-to" video demonstrating a specific second grade math skill. They were to take turns filming each other in a demonstration that could be shared with others. There were two very valuable aspects to the assignment. First, the kids were totally engaged. Imagine being a child and being asked to work with a friend and use technology! Kids love to take pictures and video! Next, they were capturing a demonstration of their understanding that I would be able to watch later, providing a marvelous assessment! 

Here are a couple of examples of the work completed by second graders:

My class took the demonstrations one more step that year, as we combined the best of our work into an interactive Youtube video! Although this step is not necessary for assessment, it is a wonderful way to make the student work authentic and provide a real world audience for the kids! If you are interested in trying this, simply go to Youtube and search for "how to annotate videos". (The annotations will not work on a mobile device, however. You will need to use a desktop or laptop computer to see the annotations.)

Although, this article was focused on math assessment, the same idea can be used for other content areas as well. Remember, learning and teaching are most visible when students take charge and become the teachers. If students can share learning with others they have truly learned!


Sunday, August 23, 2015

The Perfect Ending: Building Classroom Community


As school begins, classroom teachers spend precious time nurturing a positive classroom community. Although there are opportunities throughout the day to build community, one of my personal favorites was just before sending students out the door at the end of the day.  Using an activity called A Pat on the Back, from the book Creating a Learner-centred Primary Classroom, by Kath Murdoch and Jeni Wilson, my class loved to end the day recognizing and celebrating one another. 
Allowing about ten minutes between the final classroom cleanup and the rush to gather backpacks and lunchboxes, I would gather my students in a circle on the floor. I started things off by saying something like, "I'd like to give Michael a pat on the back for being a careful listener today" or "I'd like to give Tessa a pat on the back for sharing her book with McKenzie today." After demonstrating the activity by offering a few pats on the back, I would say to the class, "Would any of you like to give someone a pat on the back?" At that point the magic began! The children were all eager to offer their "pats" to each other. The kindness and thoughtfulness that followed always amazed me as my students were careful to include everyone. There were comments like, "I'd like to give Amy a pat on the back for being a good friend," or "I'd like to give Sammy a pat on the back for not giving up when math was hard today."

In addition to building a sense of community, the heartwarming moments also allowed time to build the all important skills of listening and speaking. It was a time to demonstrate how to take turns speaking. Their first inclination was to raise their hands, but I quickly explained that I would not be calling on them. It was their opportunity to have a conversation with each other without looking to me. They learned to take turns. They learned to listen and respond. They also learned to invite those who seldom spoke to take a turn by saying something like, "Ben, would you like a turn?"

The most difficult part of the activity was bringing it to a close while children had more to say. I tried to end each session with a group pat on the back for the class like, "I'd like to give the whole class a pat on the back for working together to make our day wonderful!" Regardless of any difficulties or struggles throughout the day, the children always left the circle feeling valued and cared for. What a perfect ending to draw our day to a close!

The first few weeks of school are critical for setting the tone for the year. A Pat on the Back is just one way to build a strong sense of community in your classroom. Moments spent now will come back to repay you for months to come!
I Like Ants from How About You? by John Farrell


Sunday, August 16, 2015

Tech-xperts - Kids Teaching Kids!


While attending the 2014 Microsoft in Education Global Forum in Barcelona, Spain, I had the pleasure of meeting an amazing group of students from Saltash.Net Community School in the United Kingdom. The talented young people, under the guidance of their teacher, Scott Wieprecht, formed a group called the Offperts. They create tutorials, blogs, and discussions about using Microsoft Office 365 in education and have become known around the world! 


If they could do it, why couldn't kids in schools everywhere become the tech experts? It took no time at all to convince a couple of other teachers in my building to give it a try. Although our classrooms are filled with technology, there are teachers who avoid including technology projects in their classrooms because they aren't comfortable with tech.

I vividly remember the day I was trying to show my class how to create an avatar on our class Xbox 360 Kinect. (That's a subject for another blog post.) I was struggling as they sat quietly watching. Suddenly it occurred to me to simply ask, "Do any of you know how to do this?" Hands shot in the air... I quickly turned the lesson over to a couple of second grade students... stood back and breathed a sigh of relief as the vision turned into reality with the kids teaching each other. They didn't need me!

So in the spring of 2014, we implemented the Tech-xperts at our school, modeled after the Offperts. The idea for our school was to have a team of students, 2nd - 5th grade, who would be available to assist teachers in classroom technology projects. The Tech-xpert team would teach other students how to use the technology tools. The classroom teacher need only come up with the assignment and ask for help. We had 10 students join our team that year, growing to 16 in the 2014-2015 school year. Here are the steps we took to put the program in place:

  • We introduced the program at a staff meeting by showing the Offperts Youtube video, and explaining how the idea could be adapted to our school. We explained the procedure that follows.
  • Next we created a script to invite students to join the group. It asked interested kids to create an application using current programs (we were just beginning to use Google Drive in our district), demonstrating their knowledge and skill with the tools. They were to show and tell why they should be considered for the team. We reminded them that they would be attending after school meetings and missing times in their own classrooms so they needed to consider their other commitments and willingness to keep current with their school work to free themselves for training others. We asked that the applications be created on their own time, not during school and gave them two weeks to electronically submit an application.
  • The script was emailed to each classroom teacher. We asked that they read the script to their students.
  • The applications were received, evaluated, and our team selected!
  • We began with a couple of after school meetings to talk about how the process would work and to allow time for the kids to work on their teaching skills.
  • Each member was asked to teach the team one skill or lesson. 
  • We spent time simply exploring, sharing, and learning from one another in a computer lab. 
  • Once everyone was comfortable, we put out another email to all classroom teachers listing suggestions for projects and offering our help. They were to email the supervisor teachers with their requested lesson and time.
  • When requests were received, the classroom teachers of the Tech-xperts team members received an email with the lesson times asking for students who would be available. It is important to have plenty of team members as there are times when the tech kids could not miss their own classes. We had plenty of students, however, to always provide 2-3 tech trainers when requested.
  • Careful communication was the key and the kids began helping implement the use of technology in classrooms throughout the school!

The Tech-xperts have been successful in many ways. The kids chose to continue meeting over the summer to share ideas and learn from each other. The teachers who invited them into their classes were delighted with the results! This past year, the team was invited to the local BLM office to teach employees about Google Drive. There is talk of venturing out to other community groups in the coming year! 

Lack of technology training, knowledge, or simple comfort should not keep technology out of classrooms. There are undoubtedly tech experts sitting in every classroom! Let the kids teach and take charge of their learning! Even the teacher may learn something new!

Sunday, August 9, 2015

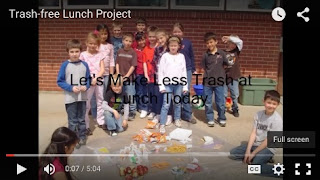
Trash-Free Lunch Project - Trying out PBL


Perhaps the best way to motivate and engage students is to challenge them to solve a real world problem. Project based learning is a powerful tool! While teaching skills and standards is important, embedding them within a meaningful task makes the learning last well beyond the assessment. The words of Will Richardson changed my teaching as he points out, "We spend way too much time on things that are taught "just in case" rather than helping kids learn just in time." 

A simple project to begin the year is one my class completed a few years ago with great success. If you are new to project based learning but would like to give it a try, pose this challenge to your students and watch them learn!

Can our class complete one week with a trash-free lunch?

How to:

  • Pose the challenge to your class.
  • Begin by investigating the amount of trash currently generated by one class in a day. Replace the trash liner in the lunch room for your class and have all class members deposit their trash in that liner for the day. Remove the liner and, as a class, examine the contents. Sort, identify, and analyze the trash while wearing gloves.
  • As a class, evaluate the contents and create a plan for reducing the amount.
  • Research alternatives to categories of trash and strategies used in other schools using online research tools. 
  • Use the class plan and new knowledge to strive for a trash-free lunch each day for one week.
  • Collect and evaluate the gathered trash each day.
  • Record and document data and results.
  • Produce a multimedia product to share the project and outcome.
There are many skills and standards to teach "just in time" within this project. Sorting and classifying, measurement, research, civics, speaking and listening in classroom discussions, and multimedia production are all possibilities. Based on your grade level standards, there are most certainly more.

Here is the multimedia product created by my class:

Sunday, August 2, 2015

Digital Summer Tales - A first writing assignment of the year...


I am a teacher....

Even though I recently retired from teaching in the classroom, I will always be a teacher...

It's not just something you do. It's not just a job. It's who you are. It's part of your soul...

Now I find myself with time...

Time to share. I have projects and ideas that I can't easily discard. I want to share them with you! So now I will blog. Each week I will share one idea, lesson, or project. It is my hope that one or more will be that one great idea you have been looking for to spark motivation and engagement in your classroom! Many involve technology, but not all. Most of the technology I used is quite simple. All can be tied to the standards, but they are not driven by standards. All will be driven by learning, passion, and fun! 

So here we go! Here is that one great idea to start off your year! This one may not be new to many of you. It has been my experience, however, that even though technology is present in schools, there are many teachers who are not yet comfortable using it! If you are one of those teachers, this is a safe place to begin. As a matter of fact, there are standards requiring students to use digital tools to publish their work, and this will meet those standards. Even if you are not comfortable, trust that your students are and give this simple idea a try:

How I Spent My Summer Vacation

That seems like an obvious choice for a retired teacher. That idea has been around forever. Combine it with digital storytelling, however, and post it to a class Youtube channel or secret group Facebook page, and you have an old idea revitalized! Have each child post their video to their Google Drive and share it with friends for comments. Feature one a week on your class website and ask for comments from parents. I guarantee your kids will write more and with passion when they realize they will be using their stories to create with technology! I am including some examples from previous students in my second grade classroom. Rule number 1: kids help kids. Find the tech expert in your classroom and put him or her to work teaching the other kids.


How to:
  • Assign the writing, using appropriate standards and targets. This is an easy one!
  • Ask the kids to bring in photos from home, or to send them digitally from their parents' phones where they are most likely captured. An alternative is to have the students draw pictures that go with their story. They will also need to create a title page.
  • Once the stories are written and photos are ready, students will practice reading their story for fluency and expression (another standard!).
  • To create the digital story, students will use a slideshow or movie-maker program. We used iPads and iMovie, but the same can be accomplished using other platforms and apps with voice recording capabilities. Ask the technology people in your building for advice on the tools to use.
  • First, students will take a picture of each photograph or drawing to be included in the digital story. Be sure and take a picture of the title page as well. 
  • Next, they will upload the pictures to the app or program and place them in order. 
  • Students will need to find a quiet spot in the classroom to record themselves reading their story into the device. 
  • Adjust the pictures to match the audio.
  • Add music if desired.
  • The teacher will need a class Youtube channel to upload the finished digital stories for sharing. Simply do an internet search for How to create a Youtube channel for instructions. Leave off any names or identifying information from the videos and you have a safe environment for kids to share.
  • Upload the stories and enjoy! You can share the finished work with family by sending home links, posting the videos to a class webpage, or creating a secret Facebook page for your class families. I found that grandparents at a distance were very grateful to see the work of their kids!
Here are a couple of examples from my incoming second grade students in years past: